How to Clean a Germguardian Filter in 10 Easy Steps
If you’re the proud owner of a Germguardian air filter, then you know that regular cleaning is essential for keeping it running at its best.
But how do you go about cleaning a Germguardian filter?
Germguardian filters are a must-have for anyone with allergies or asthma. They help remove common allergens and bacteria from the air, improving your quality of life. But like all appliances, they need to be cleaned regularly to continue performing their best.
Follow our simple steps guide for a hassle-free clean every time.
Here’s how to clean a Germguardian filter in 10easy steps.
Table of Contents
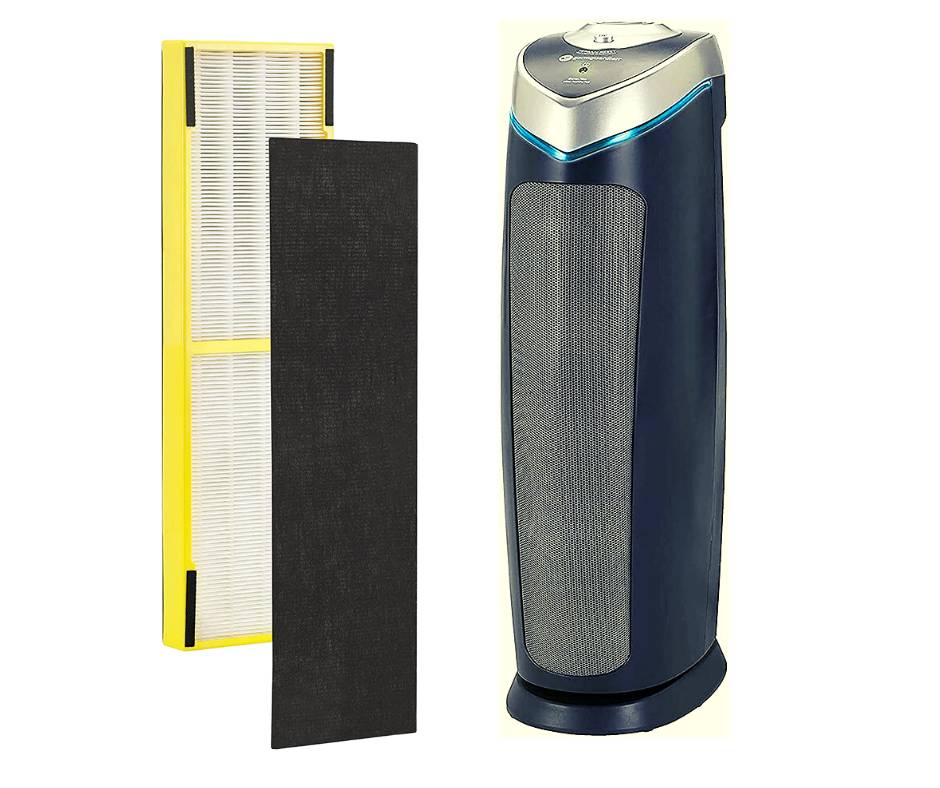
What Is A Germguardian Filter?
A Germguardian filter is a device used to purify the air. It does this by trapping allergens, dust, smoke, and other airborne particles. The filter must be regularly cleaned to perform at its best. Dirty filters can lead to decreased air quality and compromised health.
How To Know When To Clean Your Filter?
Knowing when to clean your Germguardian filter is as important as knowing how to clean it. If you notice that your unit is not performing as well as it used to, or if the air quality seems worse, it might be time to clean the filter.
Another indicator that it’s time for a cleaning is if your filter is discolored or if there is an accumulation of dust or pet hair on it. A little bit of maintenance can go a long way in keeping your Germguardian running like new.
How To Tell If The Filter Needs Cleaning?
It is important to clean your Germguardian filter regularly to ensure optimal performance. The filter will need to be cleaned when:
- It becomes difficult to breathe through the filter.
- The filter becomes discolored.
- Filter emits an odor.
- The filter is clogged.
If you notice any of these symptoms, it is time to clean your filter. You will need water, vinegar, and a cleaning brush (optional) to clean the filter.
- First, unplug your Germguardian and remove the filter.
- Next, soak the filter in water for 10 minutes.
- Mix one part vinegar with two parts water and pour the mixture over the filter.
- Let the filter sit for another 10 minutes.
- Finally, use a cleaning brush (if necessary) to scrub off any built-up grime.
- Rinse the filter off with water and reattach it to your Germguardian.
How To Clean Your Germguardian Filter?
The Germguardian filter is one of the most important components of the air purifier. It removes contaminants from the air, but it also captures and eliminates bacteria, viruses, and other allergens. That’s why it’s essential to clean the filter regularly.
Here are 10 easy steps to help you clean your Germguardian filter:
- Unplug your Germguardian.
- Remove the filter by gently pushing down on one end and pulling it out.
- Rinse the filter under running water for a minute or two.
- Soak the filter in a tub of hot water and 1/4 cup of vinegar for 15 minutes.
- Rinse the filter under running water for a minute or two.
- Shake out any excess water and place the filter back in the unit.
- Plug in your Germguardian and turn it on.
- Run a room air purifier for at least an hour to remove any vinegar smell from your unit.
- Turn off your Germguardian and unplug it.
- Wait until the filter has completely dried before replacing it back in the unit.
How To Put The Filter Back In?
After you’ve cleaned the filter, it’s time to put it back in the unit.
Here are the steps:
- Open the front cover of the unit and remove the filter.
- Rinse the filter under warm running water.
- Squeeze out as much water as possible and place the filter in a sunny spot to dry.
- Once the filter is completely dry, reinsert it into the unit.
- Close the front cover and power on the unit.
- The filter replacement light will turn on and stay on for about 5 minutes as the filter loads into memory.
- The light will turn off, and your unit is now ready to use.
What To Do If Your Filter Is Damaged?
If your filter is damaged, it’s important to replace it as soon as possible. A damaged filter affects the performance of your air purifier.
It could also cause bacteria and other allergens to build up and circulate in your home. If you’re not sure how to replace your filter, don’t worry! We’ve got a handy guide that will walk you through the process step-by-step.
How To Store Your Germguardian Filter?
After you’ve cleaned your Germguardian filter, it’s important to store it properly. This will help keep it in good condition and prevent the accumulation of dirt and dust. Here are a few storage tips:
- Keep the filter in a dry place
- Don’t store it in direct sunlight
- Don’t store it near harsh chemicals or anything that might produce fumes
- Keep it away from pets and animals
- Don’t stack anything on top of the filter
Final Words
A Germguardian filter is a lifesaver when it comes to keeping your air clean, and it’s important to clean them regularly to ensure their effectiveness. So that it can continue to do its job. Follow these 10 easy steps to get your filter squeaky clean and running like new.